How to Install latest WordPress On Ubuntu 16.10/16.04 Using LAMP Stack
WordPress is the most popular CMS on the internet. Its free and open-source platform. You can easily set up your blogs, business websites, e-commerce websites and many more with a few clicks. These system are ready to use systems. Just few clicks and adding some basic contents make your site live and you can easily update/add new data on your site easily.
WordPress is free, easily customizable, very easy tool for creating websites. You can many variety of plugins as per your need and choose from many of themes available free of cost on internet.
In today’s tutorial, we will show you steps followed to install the latest version of WordPress on your Ubuntu 16.04 LTS.
Prerequisites
You will need to perform the following tasks before you can start with this tutorial:
- Install a LAMP stack: WordPress needs a web server, a database, and PHP to function. So, you should have all of these i.e LAMP stack (Linux, Apache, MySQL, and PHP) on your system.
Step 1: Download WordPress
Now that our server software is configured, we can download and set up WordPress. For security reasons in particular, it is always recommended to get the latest version of WordPress from their site.
Change into a writable directory and then download the compressed release by typing:
We can now move on to the WordPress installation. We will download and place the WordPress installation in the default web server document root directory (/var/www/html).
Let’s move to this directory with:
cd /var/www/html
And download the latest WordPress installation from the official wordpress.org site with wget:
wget -c http://wordpress.org/latest.tar.gz
Then, extract the file with:
tar -xzvf latest.tar.gz
All the WordPress files will be now placed in the wordpress directory in /var/www/html/wordpres
We also need to set the correct permissions of this directory so our Apache web server can access these files. To give ownership of the WordPress files to our Apache web server, run the following command:
chown -R www-data:www-data /var/www/html/wordpress
Step 2: Create a database for WordPress
Now, we will create our MySQL database for our WordPress site. Login to your MySQL server with the following command and enter your MySQL root password:
mysql -u root -p
To create a new database for our WordPress installation, run the following commands:
CREATE DATABASE wordpress_db;
GRANT ALL PRIVILEGES ON wordpress_db.* TO 'wordpress_user'@'localhost' IDENTIFIED BY 'PASSWORD';
FLUSH PRIVILEGES;
exit;
You can replace the database name (wordpress_db) and the MySQL user name (wordpreess_user) with your own names. Also, make sure to replace “PASSWORD” with an actual, strong password.
Once the database is created, we will need to add this information to the WordPress configuration file.
Make sure you are inside the /var/www/html/wordpress directory and run the following command to rename the sample configuration file:
mv wp-config-sample.php wp-config.php
Now open the wp-config.php file with your favourite text editor, for example:
nano wp-config.php
And update the database settings, replacing database_name_here, username_here and password_here with your own details:
// ** MySQL settings - You can get this info from your web host ** //
/** The name of the database for WordPress */
define('DB_NAME', 'wordpress_db');

/** MySQL database username */
define('DB_USER', 'wordpress_user');

/** MySQL database password */
define('DB_PASSWORD', 'PASSWORD');

/** MySQL hostname */
define('DB_HOST', 'localhost');

/** Database Charset to use in creating database tables. */
define('DB_CHARSET', 'utf8');

/** The Database Collate type. Don't change this if in doubt. */
define('DB_COLLATE', '');
Save and exit the file.
Restart your Apache and MySQL server with:
systemctl restart apache2
systemctl restart mysql
With this being done, you can now access your WordPress and finish the installation by following the on-screen instructions in your browser at http://your_server_ip_address/wordpress
Step 3 : Install WordPress CMS Or Complete the Installation Through the Web Interface
Now that the server configuration is complete, we can now complete the installation through the web interface.
In your web browser, navigate to your server’s domain name or public IP address:
http://server_domain_or_IP
We will on the main setup page.
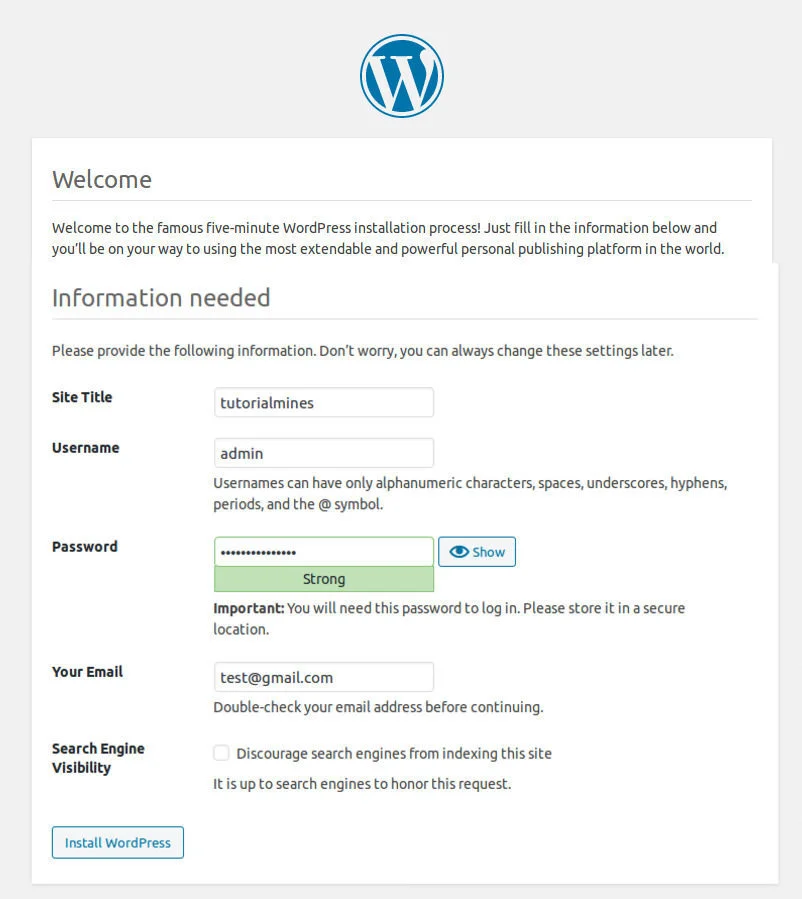
Select a title for your WordPress site and choose a username (it is recommended not to choose something like “admin” for security purposes). A strong password is generated automatically. Save this password or select an alternative strong password.
Enter your email address and select whether you want to discourage search engines from indexing your site:
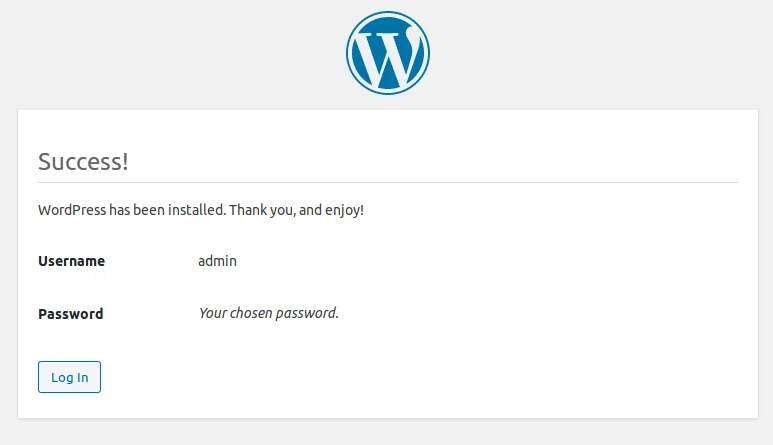
When you click Install WordPress, you will be taken to a page that prompts you to log in:
Once you log in, you will be taken to the WordPress administration dashboard:
Conclusion
WordPress should be installed and ready to use! If this is your first time using WordPress, explore the interface a bit to get acquainted with your new CMS.


