Project Setup – Angular7 (Create first app)
Now the next step is to start your first angular project. Jump into the folder where you want to keep your projects, and follow the commands to install a new Angular 7 project :
C:\> ng new my-test-app
It’s going to present you with a couple questions before beginning:
Would you like to add Angular routing? Yes
Which stylesheet format would you like to use? SCSS [ http://sass-lang.com ]
It will take some minutes and once completed, you can now jump into the new project folder by typing:
c:\ cd my-test-app
Open up this project in your preferred code editor (I use Visual Studio Code, and you can launch it automatically by typing code . in the current folder), and then run this command to run a development server using the Angular CLI:
ng serve -o
-o is for open, this flag will open your default browser at http://localhost:4200. Tip: You can type ng to get a list of all available commands, and ng [command] –help to discover all their flags.
If it does not get opened by default. Go to your web page after the compiling process is completed. Type the URL Http://localhost:4200/my-test-app and your first page of the Angular gets opened.
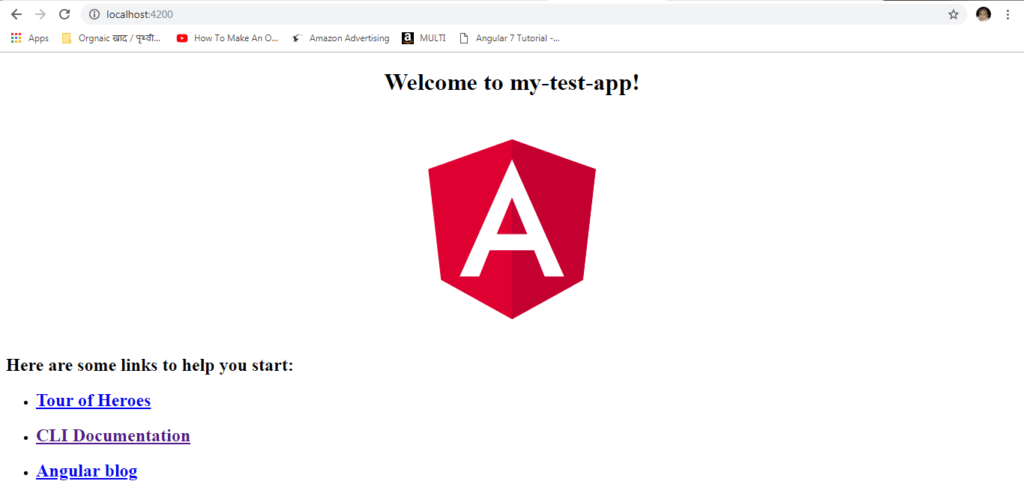
Below will be seen on your web browser screen
Hurray! If everything goes well, you should be presented with the standard landing page template for your new Angular 7 project.
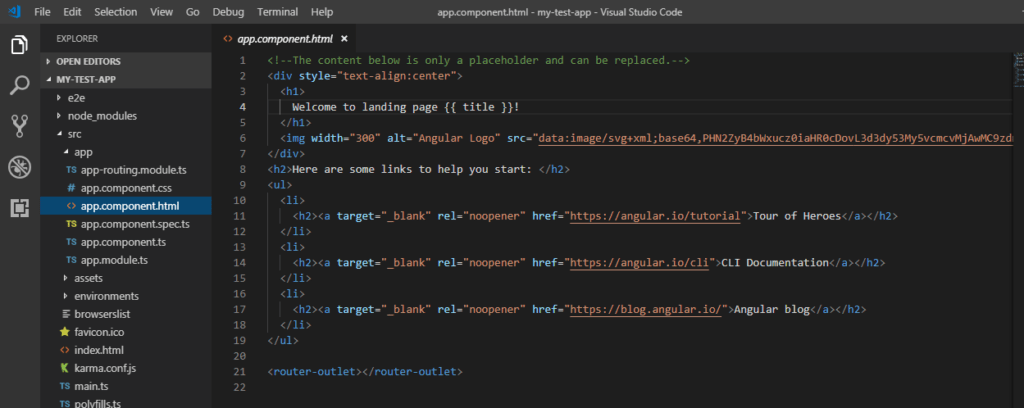
Now, we can use any IDE (editor) to edit and run our code. In this tutorial, we are using Visual Studio. Open the IDE and open your app “my-test-app” in it. It looks like below :
Now expand the “my-test-app” folder and
You will see 6 components in “app” folder there:
- app.component.css
- app.component.html
- app.component.spec.ts
- app.component.ts
- app.module.ts
- app-routing.module.ts
Now we will go through all the components to look and understand what is going on each one of them.
app.component.css
Here is no code in this file now. As, we have not added any code in this file yet.
This part is empty because we don’t specify any CSS here.
app.component.html
This is the most important component, the front page of your app. Here, you can change the salutation used before your app’s name. You can also change the content on the front page and their respective links.
This is the home page of your site, this is also called front page. Here, you can change the content, links of you page.
Code:
app.component.spec.ts:
This file is used for testing purpose only.
app.component.ts
You can change the name of your app here. You just have to change the title.
app.module.ts


